Thursday, August 9, 2012

Monticello

Two weekends ago I drove to Charlottesville because my best girlfriend from undergrad moved there. My excitement was through the roof! No more making the long driving to West Virginia just to see her - she and her main squeeze are just a short, hour-long drive from me now. Her mom followed them in on Friday to help them unpack, purchase furniture, etc. and I drove in Saturday morning to do the same. I had beat the unpacking part, but I did offer my furniture-putting-together expertise (only one piece though - her man did the rest). We made several trips to Wal-Mart, Target, Marshall's, TJ Maxx, Pier 1, and Office Depot (I'm sure I'm leaving one out). Even though I was exhausted at the end of the day, it was just like old times - driving all over town shopping together. 

The next morning, I planned to let them sleep in, but ended up waking them anyways because I locked my phone in their apartment - fail on my part. It was like 10:30 though, so not too early.  After retrieving my phone, I headed to Bodo's for a delicious bagel. Plain bagel, lox, and fresh veggie cream cheese - Bodo's is a must if you're ever in C-ville.

I resisted my bagel for about 20 minutes and made the drive to Monticello. The weather was significantly nicer than in Richmond, so I took full advantage of the cooler temps and light breeze. I had intended to only walk the gardens and take pictures, but it's a lump sum ticket price so I went for the tour also. I hadn't been to Monticello, Michie Tavern, or Ashlawn since I was about 12, so I definitely had a much larger appreciation seeing it all again. Growing up, I was all about going on house tours, history museums, and things of the like. It's how my Nannie and I spent a majority of our weekends together. A lot of the things that the tour guide mentioned I definitely didn't remember from before - one of the cons of visiting these places as a kid (you simply forget or don't retain).

Some of the things she shared included Monticello meaning little mountain. Did you know that? It's Italian. Tell all your friends the next time you're having tea and crumpets. It's sure to impress them. Why not French or any other exotic language that Thomas Jefferson perfected? Beats me. I'm going with the idea that "little mountain" didn't sound nearly as pretty as it does in Italian. Or how about the fact that Monticello is the only presidential home on a piece of currency - cue the nickel. Perhaps you thought that we have always had left and right shoes? Wrong-o. We didn't have left and right shoes until the Civil War. Ol' TJ was way before all of that. 

The most inspiring part? Thomas Jefferson was seriously educated. He knew seven languages that he taught himself. He believed in reading things that were written in their native tongue(s). Talk about impressive! He was a horticulturist, inventor, writer, lawyer, educator, our president, etc. He too wore many hats. He was not a money manager though. His grandson took care of that for 30 years after he passed. Talk about a burden! Even though he contributed many things to our country, Thomas Jefferson wanted to be remembered and known for three things in his life - the author of the Declaration of Independence, responsible for the Statute of Virginia for Religious Freedom, and the Father of The University of Virginia.

I couldn't take any pictures inside Monticello, but I think I covered everything outside including his beautiful gardens. It was a beautiful day with intermittent clouds and sun. Let the pictures speak for themselves.

From the entrance side of Monticello.


Thomas Jefferson was such a smart man. This wind vane is actually attached to a compass directly underneath of it on the ceiling of the porch. Rather than having to walk all the way out in the yard to see the weather vane and determine which way the wind was blowing, he just had to step out on his porch. Genius or lazy? If I were his daughter wearing one of those huge dresses during Virginia summer heat - I'd say genius!


This porch was just off of Jefferson's "Book Room." He would read here in the afternoons and take in the beauty of his flowers.


This is SOOC. It's beauty completely blows my mind and rocks my socks off.
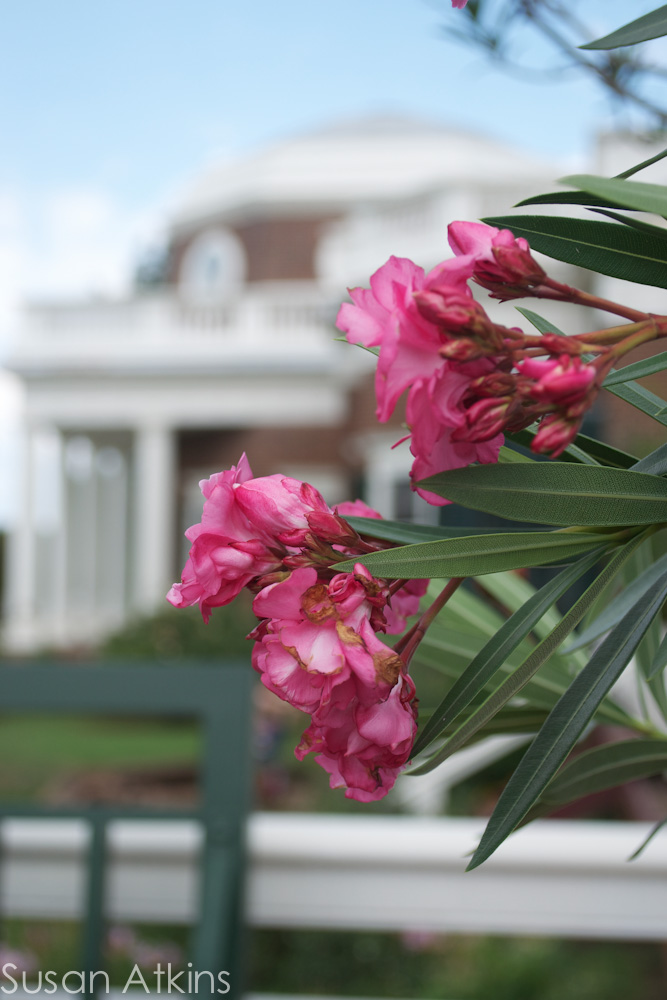


Woo baby. Would you look at those lines?


It was springtime when I visited Monticello as a kid - probably the most highly visited time because everyone wants the beautiful tulips that are always in bloom in their photos. I must say - I'm more into the summertime flowers and beautiful fall trees. 


The sun came out to play!

Jefferson sure knew how to pick a mountain didn't he? Beautiful!

Overlooking his fruit, vegetable, and herb gardens.


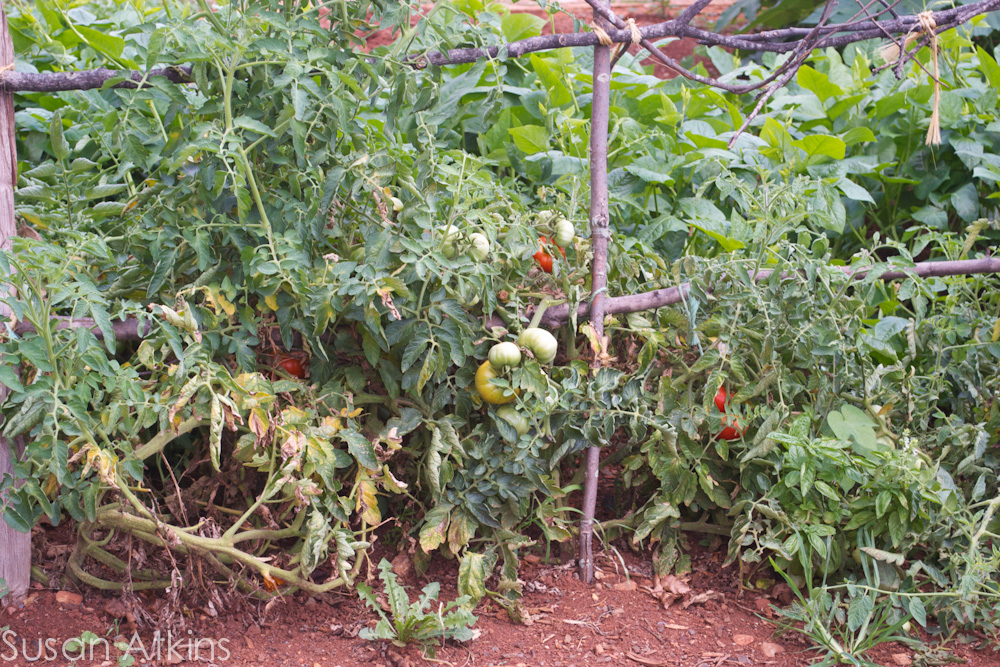
Red and green 'maters!

Turnips.

Melons.

Look at these artichokes!


Cantaloupes.

Okra.

Sesame.


Rather than take the shuttle back, I took the trail back to my car and passed by TJ's family cemetery.


As a thank-you for visiting, he was there waiting for me when I returned.

-Suze

Monday, August 6, 2012

Wake Up Little Susie

Did anyone have one of these bad boys growing up?

This girl right here did and she loved it. Mine didn't have dual microphones - mine only had one (my parents probably planned it that way haha). I remember taking this thing everywhere with me, singing songs I knew and some I didn't! I had those Wee Sing - Sing Along books and tapes and those were  my best companions. I'd select which tape I wanted to listen/sing to, pop open my Playskool tape player, put my tape in, and sing. Sing all of the songs from the book. I actually had this exact book with tape.

The most memorable book I couldn't locate on the internet, but I remember it having 50's sock-hop like songs on it. My favorite? Wake Up Little Susie by The Everly Brothers. I can't imagine why it was my favorite? I used to sing that song until I was blue in the face, and my mom would sing it to me in the morning at an attempt at waking me up for the day. Eventually I grew out of this song. I no longer sing it, and no longer carry around my tape player everywhere I go. 

It's still very near and dear to my heart though. Yesterday, I shared I how I made the cutest darn banner, and I mentioned promised to share what it was hanging from. This cutie will be hanging in the large, bla spot above my dresser and could't be more excited! Here she is.


(Screaming like a little girl over here!) Totally love it. Has a little bit of an OCMS feel. Anyone? 

Wanna make one inspired by childhood memories? This project took off because I was inspired by this girl's canvases with quotes from her dad - I tweaked mine a little (no Mod-Podge, books, etc.). Heres how:

Wake Up Little Susie Canvas


What You'll Need To Make It

  • Large Canvas (I used 20" x 20")
  • Spray Paint (At least two colors, a base color and another to spray over your letters. I used a flat metallic silver for my base and a glossy bahama sea color for my top coat. Both were by Krylon. I have used their paint in the past - I think they have done something different to it. The glossy was a complete and total mess. Still satisfied with the appearance though.)
  • Vinyl Letters (If you need more than one U, buy two packages. Yes, I had to go back out for another.)
  • Sandpaper or Scotch Brite Pad
  • Stain (The Minwax I used was the same color/can used by my dad to stain the trim of our house . . . 19 years ago. Yea, it's old. They still make the color I used though.)
  • Gloves
  • Old Rag (Use to apply stain.)
  • Clear Sealer
  • An Inspired Quote or Saying


How To Make It

  • Start with a fresh canvas.
  • Spray your base coat color all over and allow to dry.
  • After drying, apply vinyl letters as you please.
  • Spray other color over base color with applied letters in place and let dry.
  • Once dry, peel away letters.
  • Use sandpaper to roughen edges and sand down any rough areas surrounding the letters. Sand some of the surface all over, exposing some of the base coat.
  • Put gloves on and dip small portion of old rag in stain. 
  • Wipe stain all over canvas, making certain to cover the roughed up areas. This doesn't have to be methodical. It's supposed to look a little old and messy. Let dry.
  • Once dry, spray with a clear sealer and allow to dry.
  • To attach your banner, use thumbtacks. I pushed them slightly into the back of the canvas, wrapped the bakers twine around the thumbtack several times, then pushed the thumbtack firmly into the canvas securing the twine and trimmed any extra.
  • Hang to display and enjoy it by drinking a cup of coffee in a chair next to it. Instant good day!

Things you'll need.

Spray your base color all over your fresh canvas.

Apply letters like you want them, spray top color all over, and let dry. I'm not sure if it was the gloss paint or my letters not being applied well, but the edges on some of the letters peeled up after spraying - may have been a combination of both. I kinda like it though. Once dry, peel off your letters.

After peeling off your letters, you'll have something that looks like this. The middle picture shows some of the rough edges on a few of the letters. Not all of them were like this, but I kinda liked it. I did smooth them out some with sandpaper so that they would pick up the stain better.

Dip your rag in your stain and begin to spread all over. You can try for something uniform, but I wanted it a little messy and a little darker in some areas. (Make sure you're in a well ventilated area for this.)

Let stain dry, apply clear sealer, then hang your banner from it!

There she is again! Love!


-Suze

Sunday, August 5, 2012

Fabric Pennant/Banner How-To

When I first moved to the Hampton Roads area for pharmacy school, I rented an apartment and painted my bedroom and living room (with tons of help from my momma) a beautiful caramel/mocha color and a yummy green/yellow color. Since I decided to paint, I didn't see the need for a lot of wall art and such (I know, I know - what was I thinking).

To compliment my comforting caramel/mocha wall color, I chose old furniture that I antiqued to look like beach cottage furniture, a cream quilt, and mixed in chocolate browns, sea ocean blues, and soft green accents.  Upon moving out, I was required per my lease to paint it back (I had intended to stay there longer than a year, but it just wasn't working out). 

I should also probably tell you that the rooms we painted were big huge rooms. So again, with the help of my momma, we painted them back to a gross, move-in-ready shade of white.  

Last year, I moved in with a girl in my class closer to the beach. This time I decided no paint. I would live with white walls (something I've never done until now). My bedroom at the beach is drastically smaller, so it could have been painted easy-peasy but I resisted. As the year progressed, I realized how much stuff I needed for my walls. How bare they were. How non-homey and un-lived in things felt. Yuck. I just don't do non-homey and un-lived in. 

What did I do? I began to fix it! This past Spring, I decided on a series of eight prints from one of my Pinterest boards (yes, picking just eight was tough) that I would DIY for one of my very bare walls. Here's an Instagram of that with some of the decor I mentioned (I promise better pictures soon). I kept with the caramel, brown, blue, green, teal color scheme and kept it fun.


Things are definitely coming along. With that spot taken care of, I still have this one spot above my dresser that is plain and bla and large. Can't have that, so I started brainstorming and pinning. I finally found the piece I needed to complete the spot above my dresser and I absolutely adore it! It has so much meaning and it's cute. What's not to love? 

Am I gonna share it today? No! I'm gonna make you wait until tomorrow. Total bummer, I know. I'm not a total buzz kill though. First I'm gonna show you how I made a banner that goes along with it. I got a little inspiration from these cuties here, here, here, and here.

Simple Fabric Pennant/Banner How-To


What You'll Need To Make It

  • Fabric (your choice of pattern(s) - I used calico prints that I got for a steal at Hobby Lobby - the smallest amount they sell is 1/8 yard if you're wondering)
  • Pattern (sized to your needs)
  • Pinking Shears (or a rotary cutter that cuts the same pattern)
  • Straight Pins
  • Sewing Thread
  • Sewing Needle
  • Iron
  • Bakers Twine (color of your choice)

How To Make It

  • Make a pattern out of paper, sized to your preference (I made two - a triangle and rectangle one. I only ending up using the rectangle one. See dimensions below).
    • Triangle - 3.5" across the base, 4" to the tip.
    • Square - 2.5" x 3.5" - cut triangle on the open end, making your tip 1.25" from the open ended portion of your fabric. 
  • Double fabric over so that only one end is open, pin pattern to fabric, and cut out with pinking shears/rotary cutter so that you have a long rectangle, unfolded or a diamond, unfolded. I cut a total of seven for my banner.
  • Once you cut out your fabric pieces, iron them flat with a hot iron. 
  • Place straight pins throughout your fabric pieces to keep both sides flat and in place while sewing.
  • Mark a line with a white fabric pencil across one side of your fabric, 0.5" from the top.
  • Stitch a back stitch across the top of your fabric creating a pocket (I chose not to sew all the way across mine because of the look I was going for). 
  • After all the fabric pieces are sewn, string bakers twine through the pockets and hang!


Things You'll Need.

Double fabric over, pin pattern to fabric, and cut out with pinking shears.

After your pieces are cut, you'll have something that looks like this.


Iron flat with a hot iron, then pin with straight pins before stitching.

Mark a line with a white fabric pencil 0.5" from the top, and stitch a back stitch forming a pocket.

Hang stitched fabric pieces from bakers twine and love its cuteness to pieces.

I promise to share what it's hanging from, tomorrow. In the meantime, make a banner! It makes any drab, boring spot so much more friendly and welcoming. I promise.

-Suze

Friday, August 3, 2012

Etsy Shops, Cupcakes, and Being a Pharmacy Student

"You can love Etsy shops and cupcakes and also be a med student in the middle of her residency."
- Elizabeth Morrow at Delightfully Tacky

Last night, after everyone had gone to bed, I was sitting at the kitchen counter, absorbing the silence and reading the autumn edition of Artful Blogging. I had my feet kicked up on the stool beside me, flipping page by page reading the testimonials of other bloggers, taking in all of their beautiful photos when one page stopped me in my tracks. I literally kicked my feet off the stool, sat straight up like a grunt at basic training camp, and said out loud, "Oh my gosh. Yes! She gets it. Thank. Goodness." It was as though I were waiting on news from a doctor informing me that my family member would be ok, except Elizabeth was the doctor and the news was that it's ok for me to be a pharmacy student and be an artist of sorts.

For any readers out there, it's obvious that I usually do posts with recipes, paintings, crafts, various photos that I take, etc. For the most part, I'm a very private person. I don't like to divulge too much information about myself to others that I'm not extremely close with. Why? Fear of scrutiny. I think many of us struggle with this.

Some may think, "Well that's dumb. You don't want to share a lot about yourself? Hellooo?? You're putting everything on a blog. On the internet." That is true. I am doing that. What I haven't been doing (up to this point) is sharing personal things. Intimate things about myself. I'm not going all 13 year-old doodled-all-over-diary on you, but I will be sharing more. More thoughts. More feelings. More opinions.

With that being said, I feel like I'm losing grip. How come? Exactly one month from today I will be packing my book bag, my lunchbox, pulling out lab value books, picking out an outfit, entering things into my iCalendar (crossing my fingers that iCloud doesn't fail me), and exhaling - because the next morning I will be heading to class to complete my final didactic year of pharmacy school course work. I have never felt so many emotions. I'm apprehensive, nervous, and anxious. I've been looking forward to this year for so long. This is the last year that I will have to sit in a classroom everyday. It's bittersweet really, but at the same time, nerve wracking.

I feel as though I'm losing grip because pharmacy school is hard. No bones about it. I'm okay with hard. I'm okay with really, really hard. I'm not okay with something completely overtaking my life. I've struggled with this since day one of pharmacy school. I like my free time. My "me time." Time to do what I want, when I want to. Maybe this sounds selfish. Maybe it is. Pharmacy school has been nothing short of major adjustments. Adjustments in my study methods, adjustments with my time management, sleep adjustments - all things I thought I had mastered in undergrad. Boy was I wrong. The adjustments I had made were perfect for undergrad, but were in no way fit for pharmacy school.

All summer (besides completing my required three week rotation at another hospital) I've worked, come home in the evenings, watched my reality TV (yes, I'm a sucker for it), painted, crafted, sewn, and more. On the weekends I've traveled, painted, crafted, sewn, taken photos, lots and lots of photos, and had sushi and fro-yo dates with one of my best girlfriends. Why? Because I could.

Pharmacy school is kind of like a meeting with a nagging boss. You aren't ever looking forward to the meeting. You dread it really. Then the meeting comes. You sit through it. You get it over with. The meeting is finally over. You're done. Back to life. Back to reality (did anyone just sing that song to themselves haha). Back to your comfort zone. 

I haven't really ever had a nagging boss, but I suppose you could also equate this to holidays with certain family members, your children getting out of school for the summer, or flying on a plane. Maybe not so much dreading your children getting out of school for the summer, rather the thought of, "What are we going to do all summer so we don't drive each other up the walls?" You get the point I'm trying to make.

The funny part about all of it is that there's literally a night and day difference within me.

Day: Put on my business casual attire, drive to one of the best teaching hospitals on the East Coast/top hospital in the state of Virginia, arrive at work, then do my thang. I utilize the tools that I have been taught in and out of the classroom, the knowledge that I have gained while working at Wal-Mart and Ukrops (a long-standing Virginia comfort now known as Martin's), as well at this top hospital. I page doctors and nurses regarding their patients' prescriptions, change doses, recommend alternative therapies for conditions that many students my age have only read about. For all of these things I am truly blessed and fortunate.

Night: I drive home from the hospital. I make it home and put on my most comfortable, worn-in WVU football t-shirt, yoga pants, and UGG slippers. I tie my hair back. I walk to the kitchen where I decide which project I will pick up that I left off on from the previous evening, or which of my reality TV shows I must watch rather than DVR, or I cook. I decide. All of the day's stresses, trials, tribulations, and anxiety wash away. I work for a few hours using my God-given talents and abilities to create things, mostly for others, with all the love I have in my heart. You have no idea how much it over joys me to make things for others. Then I hit the hay.

I do this everyday. I have done this everyday since May. This is why I feel as though I'm losing grip. Losing touch with things that I love so much. Things that I won't get to just pick up at leisure once school starts because once school starts back, what is leisure?

Anything worth having requires work, and I'm no stranger to that. I just have to suck it up. I have asked myself, why is this summer different than the rest? I've summed it up as being the last summer in which I really have the freedoms to do whatever I want. Last summer I worked a lot, worked lots of overtime, worked for people that needed time off, etc. I viewed it as making a little extra money. This summer - my last summer - my mentality changed. I've spent quality time with friends and family, spent time making things, cooking things, eating things. All things that I enjoy. I can make money for the rest of my life. Why not use the time that I have as a young, fit adult and just soak it all in and enjoy life to the fullest?

Let me get back to Elizabeth's statement. The point is, is that even though I have invested a great deal of time and energy with my schooling, my daytime person makes me tick in a different way than my nighttime person. I love science and learning, especially about the human body and how resilient it is. My nighttime person completes me. It is the side you see on this blog.

My daytime person can be a med pharmacy student. My nighttime person can scroll through pages of creative Etsy shops, adding things to my cart that I long to have. She can love cupcakes and have an entire Pinterest board devoted to them. Elizabeth - Thank you for recognizing this and other things with your inspiring and heartfelt words.

My daytime person is what I do. My nighttime person is who I am.

-Suze

O! And one more thing! Another very creative girlie (that I've had the pleasure of meeting) is featured in this same edition of Artful Blogging - Becky over at Farmgirl Paints. Woohoo. How exciting is that?

Thursday, August 2, 2012

Lycopene Overload

Have you had enough tomatoes yet? Better get your fill - the end of summer is quickly approaching (doing my happy dance over here). Well if you haven't gotten your tomato fix, or you have a ton of tomatoes and nothing to do with them, it appears everyone has been posting recipes about what to do with their excessive tomato supply lycopene overload.

Check out these yummy creations. You'll be glad you did!

For the longest time I associated lycopene with ketchup, and I SHOULD NOT have been (pre bachelor's degree in Human Nutrition). Growing up, my family ate (and still does eat) Heinz ketchup. I always remember the back of the bottle advertising that it was a great serving of lycopene. False. However, it is a daily dose of sodium and high fructose corn syrup. Don't believe me? Check your bottles people!

These days, Heinz makes a Simply Heinz product that contains only the real stuff (they have an organic version too). I'm a sauce gal, so things like this are important to me.

Why is lycopene so important? So glad you asked! The American Dietetic Assocation explains a little about it here and provides various scientific, research journal articles about it's contributions here.

What ya' waiting for? Break out those cutting boards and knives and get slicin' for a real dose of lycopene!

-Suze

Wednesday, August 1, 2012

Tomato Sandwiches - A Southern Summer Favorite

Here in the South we eat tomato sandwiches during our hot, humid summers. There's nothing better than a cold, juicy, fresh tomato, sprinkled with salt and pepper, squished between two pieces of white bread - mayonnaise spread generously on each piece. 

I believe I've mentioned it before, but Virginia has some of the most unbearably humid summers (some people love it - I am not one of them). We also have an extremely bountiful summer crop season. Maybe the humidity is what makes our vegetables, especially our tomatoes, so darn good. I guess I'll settle for some humidity in exchange for delicious tomatoes. 

I've been eating tomatoes - specifically tomato sandwiches - as far back as I can remember. In fact, I don't really remember a life without them! So how do you make the perfect, southern tomato sandwich? I'm so glad you asked. 

Perfect, Southern Tomato Sandwiches (pronounced Tuh-May-Toe Sandwich or May-Ter Sandwich)


What You'll Need To Make Them
  • White Bread (I know white bread is awful for you - simple carb central. This is one instance in which you must make the sacrifice and purchase white bread.)
  • Ripe, Local Tomatoes 
  • Duke's Mayonnaise (Duke's is also your only option. Don't get the olive oil mayonnaise and absolutely, do NOT purchase Miracle Whip. By the way, when you're making this, it's pronounced mayn-aze or mann-aze. Duke's is also used in Potato and Macaroni Salads - pronounced Puh-Tay-Toe Salad.)
  • Salt and Pepper

How To Make Them
  • Slice tomatoes.
  • Spread Duke's on your white bread.
  • Top sauced-up-bread with tomatoes.
  • Sprinkle salt and pepper over tomatoes.
  • Squish slices together, eat, and thank me later.


Since today is my day off, I've spent the morning finishing up lots of projects that I can't wait to share. I was working right along and before I knew it, it was 1:15 and my stomach was having a fit. I looked around and found a bunch of fresh tomatoes on the counter. What to do with them? Obvious answer was tomato sandwiches.

I didn't have any white bread, only white hot dog rolls. Those would definitely work. I also wanted a little kick, so I added Tabasco Sauce to my Duke's.

Slice your 'maters.

Look at that beauty!

Duke's is the only way. I'm telling ya.

Add a little of this bad boy to your Duke's.

Sprinkle our good friends salt and pepper over your sliced 'maters, and add a slice or two of provolone - you know. To get some dairy in.

Now look what we have here! All three of these weren't for me - this doesn't mean I didn't eat them all. Whoops.

Please make them. And think of me when you eat them.


What are some of your Southern favorites? Do any of them include Tabasco?

-Suze