Showing posts with label Crafts. Show all posts

Thursday, February 21, 2013

DIY Map-Inspired Resin Drink Coasters

Hey there!

Who's ready for a little craft? I promise it's fun and it will definitely wow your friends! I'm sure many of you have seen various tutorials surface on Pinterest on how to make drink coasters using bathroom tiles, your favorite photographs, and resin. How's this tute different? I've used it all - photos, paper, etc. I know what works and doesn't and the best method for each!


I actually made these for the first time about a year or more ago, and the thought of using resin scared me. I had the shakes and muscle twitches at just the mere thought of using it. 

Why? 

I.Have.No.Idea.

I'm usually the first to jump on board with new materials and tools, but this resin stuff was throwing me for a loop. I think it was because I had never used it before, you have to work quickly (I like to take my time with arts/crafts), I thought I might screw up my project and have to scrap it . .  the list goes on. 

Why on earth would I tell you this is fun and then tell you I had night sweats about the thought of using it? Because! I'm here to build you up! To add a new skill to your craft knowledge arsenal! To be your rah-rah resin cheerleader. For real though. You can do this. It's not bad. You'll be so proud of yourself when you're done. And what's the worst that could happen? Let's say you do mess up. You've only spent about 30 minutes of your time and just a couple bucks. More importantly, you'll have learned what not to do for next time.

Let's get started shall we? This is gonna be a little mix of Instagram/big-girl camera pictures. 

If you're using photos, you will not need Mod Podge. If you are using something paper-based like scrapbook paper, old love notes, or in my case, maps - you will need Mod Podge. What kind? O that's a good question. Out of all the craft goods that I own, Mod Podge is not one of them. Just never been a Mod Podge girl. Sue me. 

My roommate used to use Mod Podge like a feen. On every surface. Everywhere. Everyday. She said she loved it. I thought ok, let me head out to give this a try. I walked up in Michael's and found this:
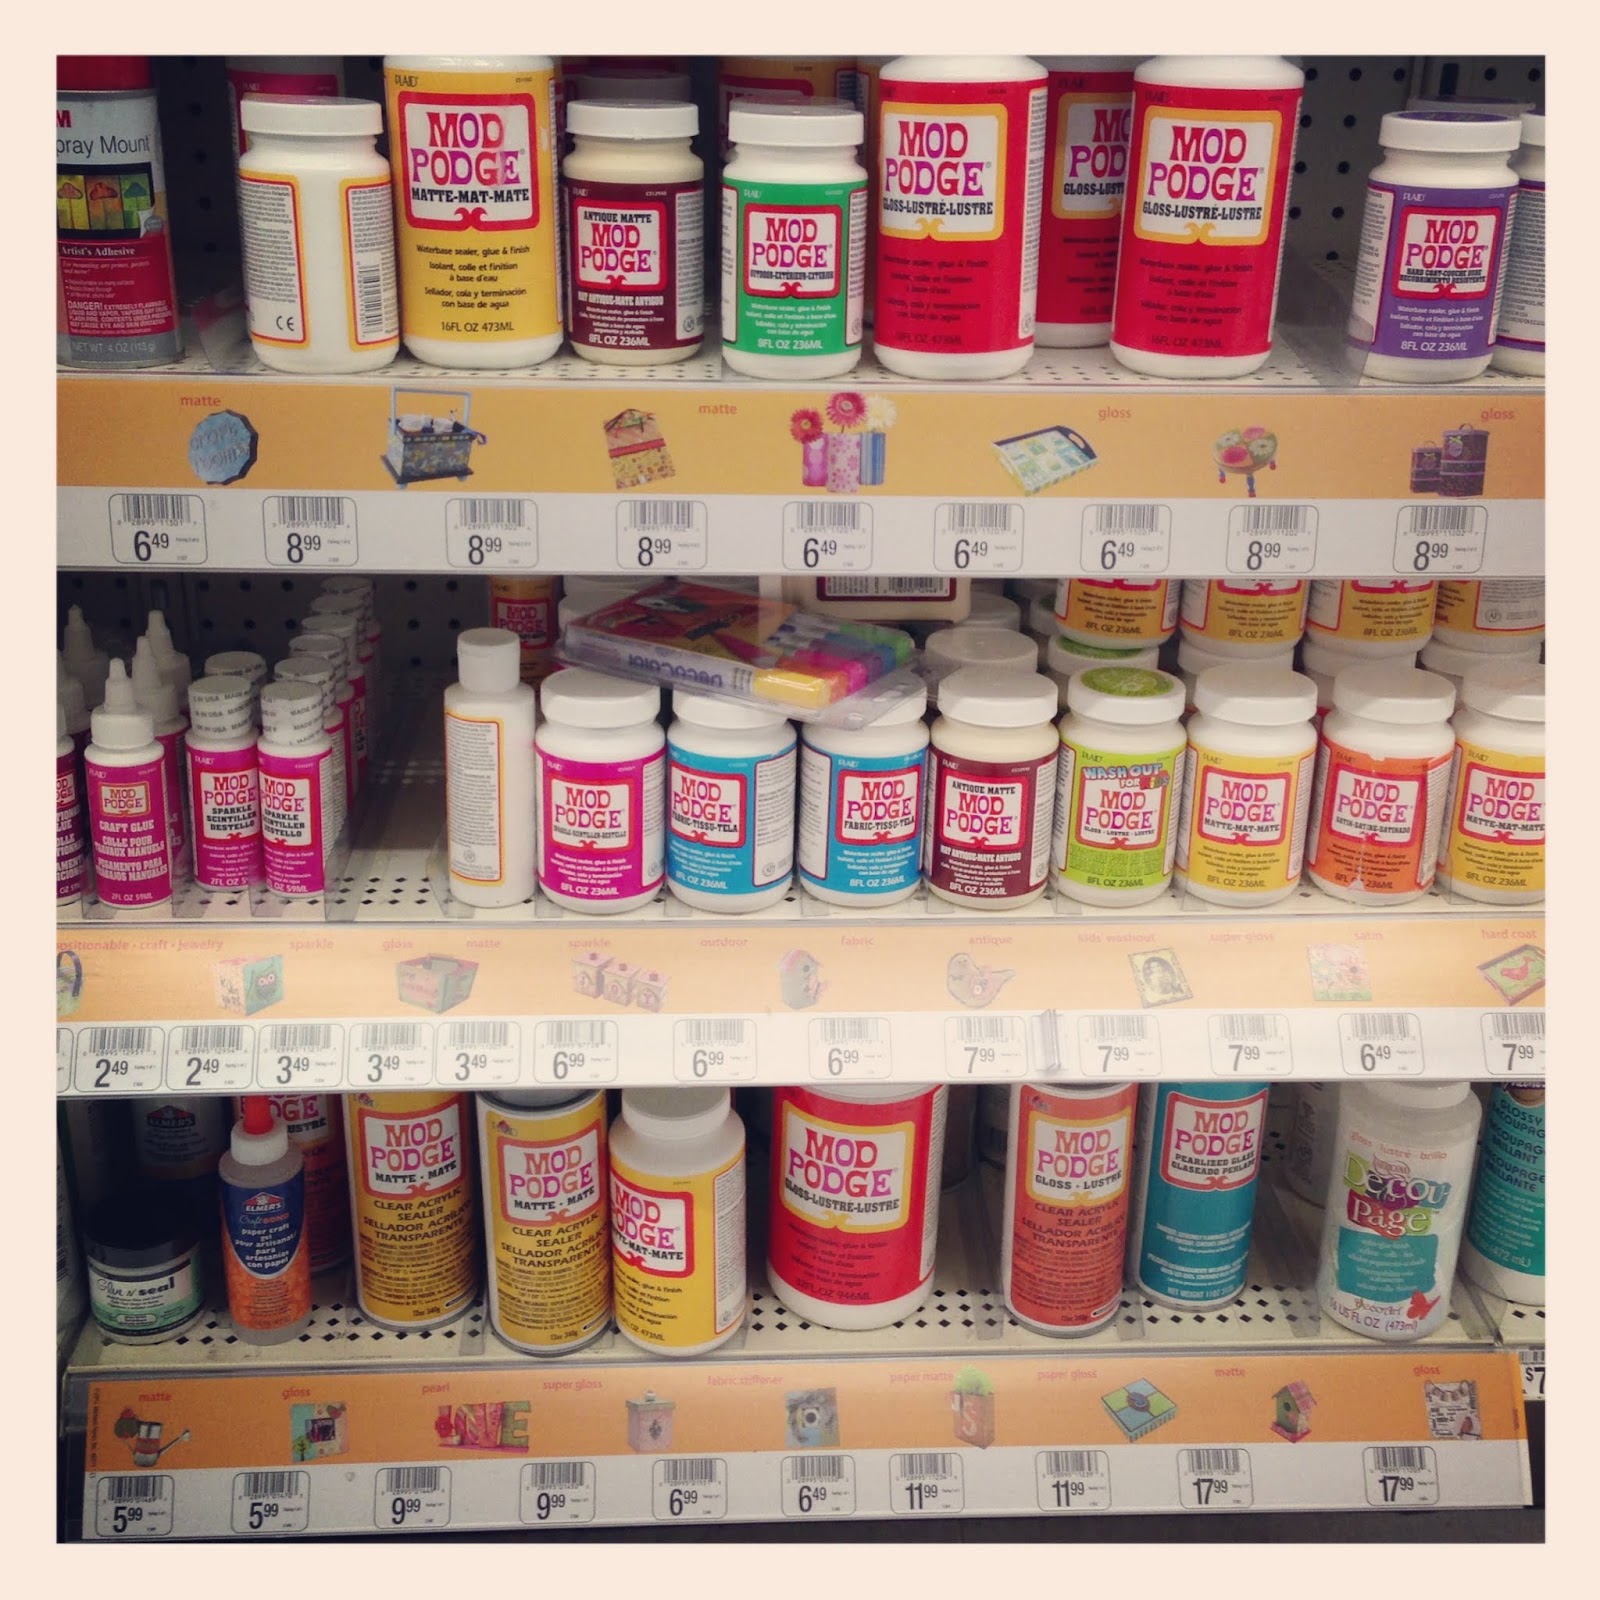
Why? Why are there so many kinds? This is where I started sweating again. Just imagine my eyes growing larger and larger as I picked up every single bottle of Mod Podge asking whyyyyyyyy each and every time. My choice? I went with the yellow one that's a matte finish (truthfully, I don't think it matters because you won't see it or your brush strokes after you pour your resin on top - the resin just needs something to grip if you're using a paper-based product on your tile). So what else will you need? Follow the steps below!

DIY Map Inspired Resin Drink Coasters


What You'll Need
  • 4 - 4x4 square bathroom tiles (the color is up to you - white/tan looks best since the sides will be white no matter what)
  • Pictures, scrapbook paper, maps, etc.
  • Glue stick
  • Mod Podge
  • Foam Brush
  • Old credit/library card - (for smoothing things out)
  • Resin - (I used the Enviro Tex Lite Resin) - For all you Richmonders, Pleasant's Hardware sells the small box and the large containers of this for a fair price (try not to buy anything else while you're in there - I dare ya). I have since seen the small box at Michael's and you could use a 40% off coupon. I purchased the small box, have over half of it left, and I've done four sets of these to date.
  • Large popsicle sticks
  • Cork Contact Paper or Rubber/Cloth Feet for Frames
  • Blowtorch or straw
  • Hairdryer
  • Four items to elevate your tiles

How To Make Em (see images at the bottom)
  1. Gather all of your supplies.
  2. Cut your images (whichever you're using - scrapbook paper, pictures, maps) just smaller than the tile, leaving a small border around the edge of the tile. 
  3. Next, roll out your cork contact paper. Use the image squares you just cut as a template and cut four squares out of cork. These will be applied to the back of your coasters to help protect your tables.
  4. After you cut your cork, apply your images to top of your tiles using a glue-stick, making sure you cover the maps well before applying to tiles (especially the edges). Smooth out with a credit card or something of the like. If you are using pictures - glossy/matte finish, it doesn't matter - skip the next step involving Mod Podge. You only need Mod Podge if you're using something paper-based.
  5. Crack open your Mod Podge and apply a thin coat with your foam brush all over the tiles. Once you have one coat on, apply another generous coat. At this point, air bubbles may be forming under your images. Using the brush/your old credit card, gently smooth out the edges/bubbles. This may take a few tries, just be patient, diligent, and gentle - you don't want to rip your image. Allow to cure - I waited 24 hours because I wanted a nice, hard, moisture-free surface. If you see brush strokes, it's ok - you won't see them once the resin is poured and set.
  6. Line a small table with parchment paper.
  7. Use four items to elevate your tiles. (I used some larger, round honey mustard dressing packets.) Keep in mind that it should be something smaller than the tile, not too tall, and stable enough so that the tiles don't tip over when you're pouring your resin. You can pretty much bet that if resin gets on the your table/items used to elevate your tiles, these things will be ruined because it's never coming off. This is why parchment paper is your friend because you can just roll it up and trash it when you're done. 
  8. Next, mix up your resin according to the directions on your box. Tip - it's better to over mix than to under mix, so . . . Stir It Up Little Darling. You could even listen to that as motivation while you stir :) This should be done in a well-ventilated and temperature controlled area. 
  9. Once you've mixed your resin, you're ready to pour!
  10. Pour a small stream of resin in a ribbon-like manner over tile #1. Use your popsicle stick to smooth it all out. Pour more resin if needed and smooth out. Less is more and the resin expands, so start low and slow with how much you pour. Once you're comfortable with your first tile, proceed to the 2nd, 3rd, and 4th tiles. 
  11. After the tops are completed, you may see some drippage on the sides and bottoms. Using a new popsicle stick, smooth the dripping resin over the sides for a nice finish and smooth out any drips along the bottom edge. 
  12. Within the first 15 minutes of pouring your resin, some tiny air bubbles will pop up on top of your tiles (usually around the edges of your images). Using a blow torch on the low setting, move across the tiles about 6-10 inches from the top of them - this will get rid of the air bubbles and set your resin. If you don't have a blow torch, using a straw to blow out the bubbles will also work. Having done both techniques, the blow torch is far easier. 
  13. Continue to watch your tiles for about 15 more minutes to make sure no more air bubbles appear. 
  14. Set your table aside, away from air vents/areas that are prone to dust, and allow the resin to sit for ~72 hours. Why so long? This will ensure a completely cured resin!
  15. Once cured, grab your cork squares, hairdryer, and cured tiles. Flip your tiles over and turn your hair dryer on the lowest warm setting. Apply heat to the back of the cork contact paper for ~1 minute. Turn your dryer off, peel of the backing slowly so that you don't split your cork, and apply to the back of your tile. Repeat for the other tiles.
  16. Wow your friends and enjoy!
Here's a couple pictures from the process!

Here are the tiles are after a couple coats of Mod Podge, edges smoothed out, and tiles drying. You can see some brush strokes but like I said, it won't matter.

You can see that awesome, glass-like finish in the next few photos.


Here they are all packaged up and ready to gift!


I hope you'll give resin a try - it really is a lot of fun!

-Sue

Saturday, September 8, 2012

Don't Worry 'Bout A Thing

Hey y'all. 

It's been a little bit, but I guess that's to be expected with everything I have going on. I made it through the first week of classes, and I think I'm really going to enjoy my OTC/non-prescription medication class. 

I'd be lying if I said this week was a cake walk. I had a ton of meetings (which went fine), but Thursday brought a series of mood shifts on the funk. And by funk, I mean depression. I've never been one to say that I've felt depressed. 

In a bad mood, a funk, just bla - yes. Those I've felt, but never depressed. I don't think this will be a chronic thing, but I know I've never felt like I did on Thursday (and never want to again). I think it's a culmination of worry and stress. When things like that happen, I try to calm myself down because I get angry rather than emotionally upset - tears, yada yada, the whole nine. I say things over and over in my mind and I pray. I pray about it because I know things will happen like they should, but I need that little convo with God and myself - talking myself down from anger, from words I can't take back, from the emotional stress of it all, etc. Sometimes, if I need that extra boost, I jump on Pinterest and look at my Words To Live By Board (call me crazy). Words can have such an impact. For real, for real. It's why I have a whole wall of them in my room. Songs do the same thing for me. Couldn't help but listen to this old SHeDAISY song on Friday, circa 2006:

Life is funny, life's a mess
Sometimes a curse, sometimes a blessing
Don't worry 'bout a thing, don't worry 'bout it.
Life gets sticky, life can bruise
Sometimes you win, sometimes you're losing
No matter what it brings
Don't worry 'bout a thing.

Don't Worry 'Bout A Thing - SHeDAISY

To help remedy my mood, I picked up my camera this afternoon. I haven't touched it since my pancakes. Seriously.  Even though these pictures may look slightly crummy, they've helped my mood ten fold. The natural light in my bedroom at the beach is CRUM.MEE. (Oxymoron - poor light at the beach? I know, but my room is on the back of the house and I have just one window. Story on the white walls here.) It is what it is though, and I've been dying to share this (gave a little peak on Instagram).

Y'all know I bought some antique Virginia license plates a couple weekends ago in Staunton for a little wall art that I had in mind. I must say, I LOVE it when things turn out just like I imagine them (I apologize for not having more pictures of the how-to process). 


Antique License Plate Wall Art


Things You'll Need

  • Antique license plates (how many is up to you)
  • Hemp Cord, twine, or thin rope of your choosing
  • Hot glue 
  • Scissors
  • Hook for hanging


How To Make It

  • Gather your plates and clean them (mine were yucko!).
  • Thread rope/cord through plates as you choose. I cut four pieces (two for in between each plate), all the same measurements and hot glued the ends together. You won't see the hot glue because it hides just behind the plates.
  • Then I threaded the rope through the holes on the bottom plate and tied together on the backside (kinda wanted everything to look cohesive - as if the rope were threaded through each hole). I trimmed the cord to make sure nothing was peeking out. 
  • I did the same for the top, making sure I left some so that I could hang it. 
    • There are a million ways to thread your rope/twine - play around with it before committing to anything. Do what works for you!
  • Finished! Now hang from a cute hook and enjoy (got this hook on sale for $2.99 at Hobby Lobby - can't beat that!). 

This is the first thing I see every morning - totally in love.


I guess I could file this one in the #enjoyingthesmallthings category. I'm trying to enjoy them because they're all I've got right now. On the flip side, I'm super excited for next weekend to get here. I'll be in Richmond for some down time, and on Sunday I'll be at Byrd Park for the JDRF 5k (my twelve year old cousin was diagnosed with Type I when she was nine).  I hope that a cure for diabetes (and HIV) are discovered in my lifetime. If you're interested in donating/walking, email me!

-Suze

Tuesday, August 14, 2012

Mercury Glass Madness

Who's feeling the madness? I know I am! This post has been a long time comin' for real, for real. I've seen various mercury glass (sometimes known as acid wash glass) how-tos over the past year or so. I have read each and every one in detail, sometimes twice. I've bookmarked some of them, deleted them. Bookmarked new ones, deleted those. Why the wait? I have no clue. 

When I was in Charlottesville, I mentioned going to various a million shops just browsing, shopping, coveting, etc. I've definitely noticed the trend of mercury glass, but it seriously stuck out like a sore thumb to me while I was there. 

A few pieces at Marshalls.

Loved these at Anthropologie. The little pumpkin of sorts in front will run ya $18!! This is why making these things is seriously a much better idea.

A lamp at Hobby Lobby.

When I got back from Charlottesville, I decided to jump on it already. I decided to do a few test pieces of glass first, since I had never worked with the Looking Glass paint that's needed to achieve the "acid wash look" that I was going for.


Mercury Glass/Acid Wash Glass Tutorial


What You'll Need To Make It

  • Vinegar
  • Water
  • Spray Bottle
  • Plastic Bag/Cling Wrap and Painter's Tape - you need something to cover the back side, outside, or reverse side of your project.
  • Clear Glass - used cheapie pieces from Michael's since this is just a test.
  • Krylon's Looking Glass Spray Paint
  • Rag/Paper Towel - you'll use this to wipe away the vinegar/water mixture to get the mercury glass effect.


How To Make It

  • To create the looking glass effect, the key is spraying the paint on the opposite side of your surface. For a vase/jar - you would spray the inside of it (keeping the outside clean). For the coasters I have - you would spray the side that rests on your table (keeping the part that holds your glass clean). Don't worry, it's a smooth finish - it won't scratch your tables.
  • With all of that said, cover the areas of your glass that should be exposed. I used a plastic bag and taped around the rim of my vase, and for the coasters I used cling wrap and painters tape. 
  • Shake paint can for about two minutes before using. 
  • Lay pieces on flat surface and spray light coats, allowing one minute between coats (continue to shake can between coats). The can recommends five coats - I think I did three or four total on my coasters. 
    • For the vase, you will have to hold it and rotate it, let it rest rim down on your surface and allow it to "drain." The paint is very thin and was somewhat streaky on my vase (flat pieces of glass worked best for me). I think I only did two coats on my vase because I got annoyed and it was hot as you-know-what outside.
  • The paint dries very quickly. Allow about ten to fifteen minutes after your final coat for drying time. While drying, combine a mixture of equal parts white vinegar and water in a spray bottle.
  • Once dry, spray your mixture onto your surfaces. Spray a light mist, leaving a few big droplets all over. Let sit for a minute or two. Begin to wipe. 
    • You can use methodical wipes, or twist while you wipe. Just play around with it. That's why these are test pieces. I did a scrubbing motion in some areas and a twisting motion in others. It didn't give me enough "acid wash effect", so I sprayed vinegar/water and repeated. After doing this, you can apply another light spray of your looking glass paint over the exposed areas to give a different look. I think I may do that for future pieces.

Here are my taped off pieces with a coat or two on them. 


After three or four coats you'll have this. The finish is quite nice.

Mist with vinegar/water mixture, let sit for a few, then rub.

After two applications and rubs of vinegar/water mixture.

Here's my cute annoying bud vase with two coats. You can see a few streaks. You can also see my fingers through the other side of the glass indicating how thin the paint is. I'm just not that great with the pieces that I have to spray into. Onto is no problem. Props to those girlies that get it perfect!

So does it actually reflect like a looking glass or mirror? You be the judge!
I'd say it does! Keep in mind that this piece only has two coats.

Sorry about these crummy iPhone photos, but the picture on the left is essentially the final product with the coasters. The one in the front looks a little blue right? I decided to experiment and painted the exposed areas with the metallic blue paint seen on the right. It actually looks pretty cool.

The verdict? This looking glass paint is some pretty neat stuff. I definitely have a larger project in mind to get the full effect of acid wash glass. The best part? The paint is like $11 and my cheapie pieces of glass ran me like $7. That means I got three pieces of glass for the price of one at Anthropologie! (Don't get me wrong, I love me some Anthro.) I still have plenty of paint left to make more pieces - that's the best part.

-Suze

Friday, August 3, 2012

Etsy Shops, Cupcakes, and Being a Pharmacy Student

"You can love Etsy shops and cupcakes and also be a med student in the middle of her residency."
- Elizabeth Morrow at Delightfully Tacky

Last night, after everyone had gone to bed, I was sitting at the kitchen counter, absorbing the silence and reading the autumn edition of Artful Blogging. I had my feet kicked up on the stool beside me, flipping page by page reading the testimonials of other bloggers, taking in all of their beautiful photos when one page stopped me in my tracks. I literally kicked my feet off the stool, sat straight up like a grunt at basic training camp, and said out loud, "Oh my gosh. Yes! She gets it. Thank. Goodness." It was as though I were waiting on news from a doctor informing me that my family member would be ok, except Elizabeth was the doctor and the news was that it's ok for me to be a pharmacy student and be an artist of sorts.

For any readers out there, it's obvious that I usually do posts with recipes, paintings, crafts, various photos that I take, etc. For the most part, I'm a very private person. I don't like to divulge too much information about myself to others that I'm not extremely close with. Why? Fear of scrutiny. I think many of us struggle with this.

Some may think, "Well that's dumb. You don't want to share a lot about yourself? Hellooo?? You're putting everything on a blog. On the internet." That is true. I am doing that. What I haven't been doing (up to this point) is sharing personal things. Intimate things about myself. I'm not going all 13 year-old doodled-all-over-diary on you, but I will be sharing more. More thoughts. More feelings. More opinions.

With that being said, I feel like I'm losing grip. How come? Exactly one month from today I will be packing my book bag, my lunchbox, pulling out lab value books, picking out an outfit, entering things into my iCalendar (crossing my fingers that iCloud doesn't fail me), and exhaling - because the next morning I will be heading to class to complete my final didactic year of pharmacy school course work. I have never felt so many emotions. I'm apprehensive, nervous, and anxious. I've been looking forward to this year for so long. This is the last year that I will have to sit in a classroom everyday. It's bittersweet really, but at the same time, nerve wracking.

I feel as though I'm losing grip because pharmacy school is hard. No bones about it. I'm okay with hard. I'm okay with really, really hard. I'm not okay with something completely overtaking my life. I've struggled with this since day one of pharmacy school. I like my free time. My "me time." Time to do what I want, when I want to. Maybe this sounds selfish. Maybe it is. Pharmacy school has been nothing short of major adjustments. Adjustments in my study methods, adjustments with my time management, sleep adjustments - all things I thought I had mastered in undergrad. Boy was I wrong. The adjustments I had made were perfect for undergrad, but were in no way fit for pharmacy school.

All summer (besides completing my required three week rotation at another hospital) I've worked, come home in the evenings, watched my reality TV (yes, I'm a sucker for it), painted, crafted, sewn, and more. On the weekends I've traveled, painted, crafted, sewn, taken photos, lots and lots of photos, and had sushi and fro-yo dates with one of my best girlfriends. Why? Because I could.

Pharmacy school is kind of like a meeting with a nagging boss. You aren't ever looking forward to the meeting. You dread it really. Then the meeting comes. You sit through it. You get it over with. The meeting is finally over. You're done. Back to life. Back to reality (did anyone just sing that song to themselves haha). Back to your comfort zone. 

I haven't really ever had a nagging boss, but I suppose you could also equate this to holidays with certain family members, your children getting out of school for the summer, or flying on a plane. Maybe not so much dreading your children getting out of school for the summer, rather the thought of, "What are we going to do all summer so we don't drive each other up the walls?" You get the point I'm trying to make.

The funny part about all of it is that there's literally a night and day difference within me.

Day: Put on my business casual attire, drive to one of the best teaching hospitals on the East Coast/top hospital in the state of Virginia, arrive at work, then do my thang. I utilize the tools that I have been taught in and out of the classroom, the knowledge that I have gained while working at Wal-Mart and Ukrops (a long-standing Virginia comfort now known as Martin's), as well at this top hospital. I page doctors and nurses regarding their patients' prescriptions, change doses, recommend alternative therapies for conditions that many students my age have only read about. For all of these things I am truly blessed and fortunate.

Night: I drive home from the hospital. I make it home and put on my most comfortable, worn-in WVU football t-shirt, yoga pants, and UGG slippers. I tie my hair back. I walk to the kitchen where I decide which project I will pick up that I left off on from the previous evening, or which of my reality TV shows I must watch rather than DVR, or I cook. I decide. All of the day's stresses, trials, tribulations, and anxiety wash away. I work for a few hours using my God-given talents and abilities to create things, mostly for others, with all the love I have in my heart. You have no idea how much it over joys me to make things for others. Then I hit the hay.

I do this everyday. I have done this everyday since May. This is why I feel as though I'm losing grip. Losing touch with things that I love so much. Things that I won't get to just pick up at leisure once school starts because once school starts back, what is leisure?

Anything worth having requires work, and I'm no stranger to that. I just have to suck it up. I have asked myself, why is this summer different than the rest? I've summed it up as being the last summer in which I really have the freedoms to do whatever I want. Last summer I worked a lot, worked lots of overtime, worked for people that needed time off, etc. I viewed it as making a little extra money. This summer - my last summer - my mentality changed. I've spent quality time with friends and family, spent time making things, cooking things, eating things. All things that I enjoy. I can make money for the rest of my life. Why not use the time that I have as a young, fit adult and just soak it all in and enjoy life to the fullest?

Let me get back to Elizabeth's statement. The point is, is that even though I have invested a great deal of time and energy with my schooling, my daytime person makes me tick in a different way than my nighttime person. I love science and learning, especially about the human body and how resilient it is. My nighttime person completes me. It is the side you see on this blog.

My daytime person can be a med pharmacy student. My nighttime person can scroll through pages of creative Etsy shops, adding things to my cart that I long to have. She can love cupcakes and have an entire Pinterest board devoted to them. Elizabeth - Thank you for recognizing this and other things with your inspiring and heartfelt words.

My daytime person is what I do. My nighttime person is who I am.

-Suze

O! And one more thing! Another very creative girlie (that I've had the pleasure of meeting) is featured in this same edition of Artful Blogging - Becky over at Farmgirl Paints. Woohoo. How exciting is that?

Monday, July 30, 2012

BYOB - Bring Your Own Bottle Nursery Print

It feels as though everyone I know is pregnant, just had a baby, or at least knows someone that I know that's having a baby. It's like our heat wave, except babies! With all that being said, I decided to get my paint juices flowing by painting some canvases for nurseries inspired by media prints/baby onesies that I've recently stumbled upon.

This onesie and this media print inspired my first canvas. I had already seen Elizabeth Caldwell's rock and roll print and loved the child-like feel of it, so I sketched my BYOB canvas with her print in mind.


Canvas Prints


Things You'll Need
  • Canvas (size is up to you - I chose 11 x 14 from Michaels for a steal of $6, but just got the regular 'ol canvas, not gallery wrapped since this project wasn't going to be too large)
  • Paint (decided on Martha Stewart Satin Finish Paints because my others had dried up from lack of use and I had never used hers before and wanted to try 'em out)
  • Brushes
  • Design of your choice
  • Carbon Paper (for transferring your image - you could free-hand yours if you prefer)
  • Pen for making fine outlines (I used a black, fine-size Faber-Castell PITT artist pen)
  • Ribbon for hanging your canvas
  • Quick-Grip (or something like it for attaching your ribbon)
  • Sealer (glossy, satin - your preference)

How To Make It
  • Start with your fresh canvas. I chose to paint mine a lighter grey color, rather than just leave it white.
  • Transfer design to your canvas using carbon paper.
  • Get painting!
  • If you hate it, don't stop! You'll be surprised how you might feel after completing it. That and you're always your own worst critic. Always good to remember - it's just paint, you can always paint over it.
  • Gift or keep for your self, hang, and enjoy!

Here's what I started with. I have this transfer paper shown because I want you to make a mental note - do NOT purchase this kind. I am a lover of all things Marth, but this just ain't cutting it. And by ain't cutting it, I mean it doesn't work. I had to purchase it though because I searched Michael's and Hobby Lobby high and low for carbon paper with no luck. I had never had such a difficult time tracking down carbon paper, so I purchased this "transfer paper" that I found. Didn't work. This means use carbon paper instead.


Start with your fresh canvas, squirt some paint on it, then smooth out. I used a foam brush because they are easy, cheap, disposable (in my book), and they work well when covering larger areas. You don't have to paint your background a color, I chose to because the nursery I was painting for had white walls. Let dry, then use carbon paper to transfer your image to your canvas (or free-hand if you prefer).

Then get ta' paintin'! After a while, I had this.

I really loved that brown. Like really, really loved it. The only problem was it showing up well on the grey background in non-natural light (i.e. Bed-time diaper changes) and it not looking like some mystery poo made it to the wall if you get my drift. So I threw the idea around in my head about painting over the brown with this dark slate color that I had. I threw this idea around for days! No clue why I was so back and forth about it. I finally took the plunge and had something that was starting to look like this.

I finished my Y, made some touch ups, outlined my small clouds, big clouds, parts of the bottle, and added some accents on the bottle with my fine-sized black out-line pen, and grabbed my sealer, ribbon, and Quick-Grip bonding glue. Lastly, I sprayed my canvas with a satin finish sealer and let dry, then attached my ribbon for hanging.

The best way to attach your ribbon is not the way I chose to do mine, so I'll share my way and the easier way. My way: tie a bow in your ribbon, then attach long strands to back of canvas with Quick-Grip. Easier way: attach ends to canvas with Quick-Grip and join together in a bow. I cut notches in my ribbon to make it look a little cuter on the back (not that anyone sees it).

Just tie the ends together in a bow.

Here she is!


This little project I'm linking up over at Farmgirl Paints. Head on over and get creative with us!
me artsy at farmgirl

paints


-Suze